
Optimize your Sony TV's picture quality by adjusting these settings.
Making a few simple adjustments to your TV can reveal its optimal picture quality. If you want to experience the incredible viewing potential of your Sony TV, keep reading.
Many TV manufacturers indicate that most people leave even the most basic settings untouched. TVs are set up right out of the box, and then that's often where it ends. However, what many fail to recognize is that just a few minutes of navigating through options can significantly enhance aspects like brightness, clarity, and accuracy.
Here's how to elevate the picture quality on your Sony TV.
Turn off these default settings immediately
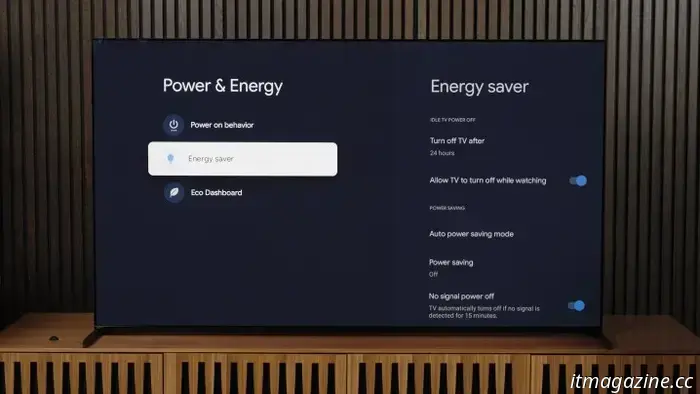
Most TVs now come with an Eco mode activated by default. If you purchased your TV for an improved viewing experience — which is generally the purpose of getting a new TV — then keeping Eco Mode on won’t provide you with the best brightness and performance.
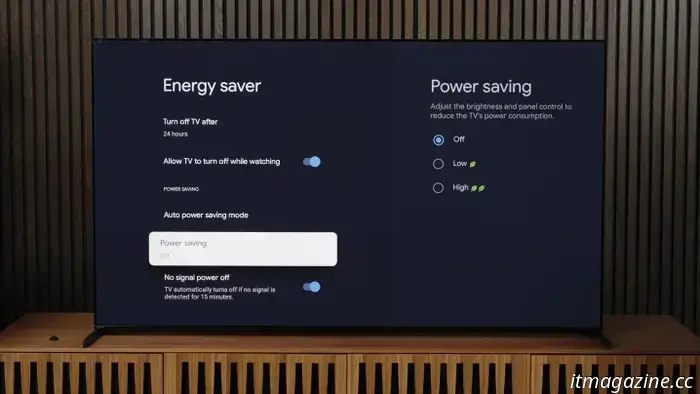
To disable Eco Mode on a Sony TV: Press the Settings button on your remote, select All Settings, navigate to System, then Power and Energy, then Energy Saver, and finally go to the Power Saving option. Here it states, “Adjust the brightness and panel control to reduce the TV’s power consumption,” indicating that the TV will dim its brightness. You definitely want to deactivate this control.
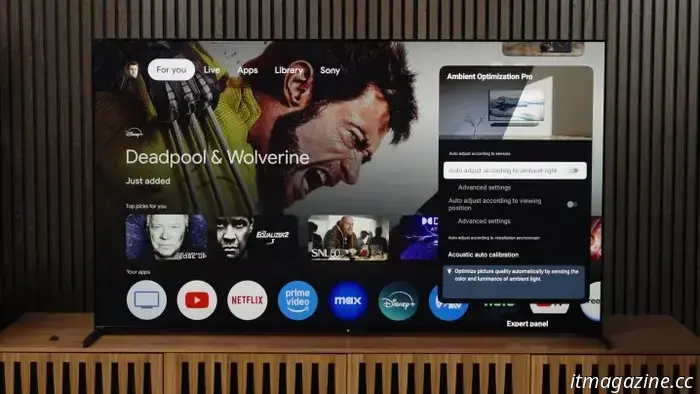
Many modern TVs are equipped with optical sensors that assess the room’s brightness and light temperature. Consequently, the TV automatically adjusts the picture to optimize brightness and color temperature. However, these automatic adjustments may not always align with your personal preferences.
Adjusting this setting on a Sony TV is simple. Press the Settings button on your remote, go to Picture and Sound, and navigate down to Ambient Optimization Pro to turn it Off. If your menu is different, you can find this option under All Settings by navigating to Display and Sound.
Now, these essential settings will be under your control instead of the TV's.
Enhance brightness
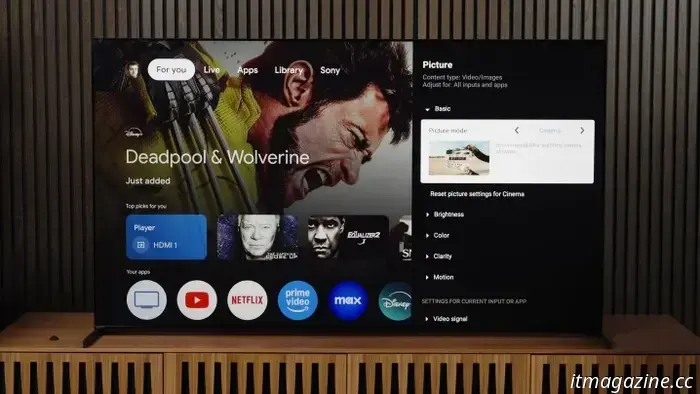
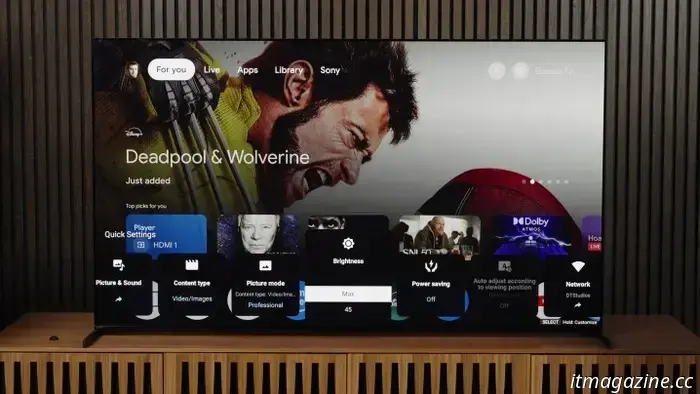
Picture Modes on TVs are predefined sets of settings like contrast, sharpness, brightness, and color temperature. To choose a Picture Mode on a Sony TV, start from the Home Screen, press the Settings button, go to Picture and Sound, then Picture, and select your desired Picture Mode. A quicker way is to press the Quick Settings button (the wrench icon) on your remote to find Picture Mode.
Modes such as Cinema or Professional are recommended. The IMAX Enhanced Mode offers a warm and natural appearance. If you prefer a cooler or bluer color temperature, you might like the Standard Mode. Vivid Mode often oversaturates the picture, rendering it harsh and over-bright.
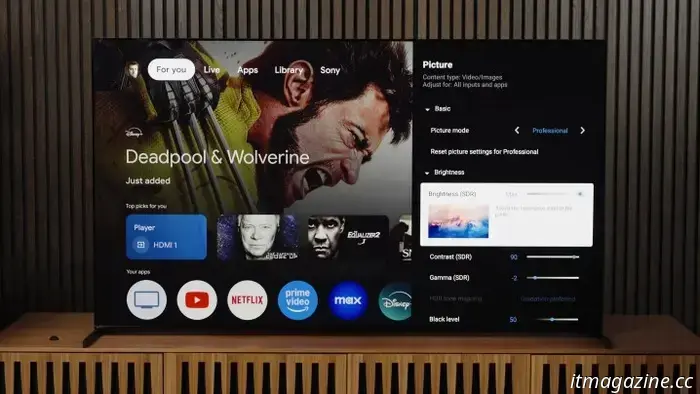
You can also adjust your TV’s brightness to suit your viewing preferences. Some viewers prefer a brighter setting for daytime, while others watching mostly at night might not need as much brightness. If you do both, you can set different brightness levels for two Picture Modes and switch between them.
Keep in mind that you’ll likely be viewing both SDR (standard dynamic range) and HDR (high dynamic range) content, so it’s important to set brightness for both. Sony simplifies this process by indicating which range you are adjusting.
To configure the brightness for SDR content: From the Home Screen, press the Settings button on the remote, go to Picture and Sound, then Picture, and select Brightness. “SDR” will appear in parentheses, clarifying that you're adjusting for all SDR content. You can also access this through the Quick Settings menu by pressing that button on your remote and navigating to Brightness.
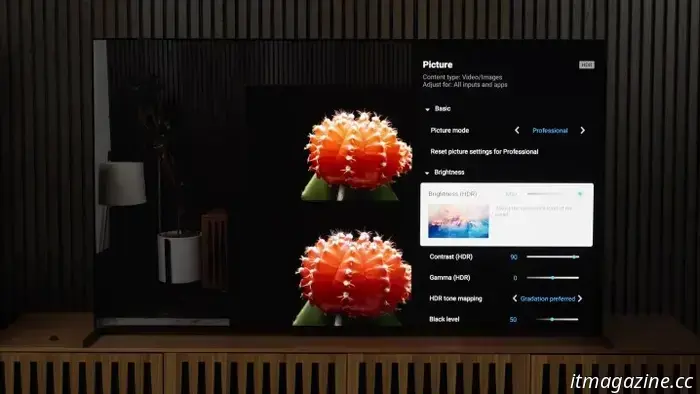
To modify the brightness for HDR content, begin by playing HDR content, such as a show on Netflix or a YouTube video. Follow the same steps for SDR, and you’ll see “HDR” in parentheses, indicating you’re adjusting brightness for HDR content.
To increase the brightness even further, navigate to Peak Luminance in the Brightness menu, which optimizes contrast—this is Sony's local dimming feature.
Experiment with Low, Medium, and High settings for Peak Luminance. This option allows the TV to maximize the HDR picture range by enhancing the brightness of the brightest screen areas—effectively increasing contrast, making highlights pop, and delivering a stunning HDR picture. The Low setting results in reduced brightness with minimized blooming and halo effects around bright objects on dark backgrounds, while the High setting boosts brightness, ideal for daytime viewing.
If you want to make water glisten or bright objects shine — to make HDR content stand out at its best — we suggest setting Peak Luminance to High, paired with maximum brightness.
Smoother motion and connections
When it comes to motion smoothing, opinions vary; some find it appealing while others believe it creates an unnatural or fake appearance, often referred to as the soap opera effect.
You can tweak the motion smoothing on your Sony TV via the Picture settings. Navigate to Settings, then Picture and Sound, select Picture, and go down to Motion to choose Motionflow. Here you can set motion smoothing to Auto, make personalized adjustments, or turn it off entirely. It’s a good idea to experiment with these options—you


Other articles
 UK autonomous driving company Wayve expands into Germany with a new hub.
Wayve has unveiled a new testing facility for autonomous vehicles in the Stuttgart area, where the British startup will concentrate on "embodied AI".
UK autonomous driving company Wayve expands into Germany with a new hub.
Wayve has unveiled a new testing facility for autonomous vehicles in the Stuttgart area, where the British startup will concentrate on "embodied AI".
 All titles departing from Netflix in March 2025
Titles such as Mad Max: Fury Road, Godzilla vs. Kong, Happy!, Aftersun, A Walk Among the Tombstones, among others, will be departing from Netflix in February 2025.
All titles departing from Netflix in March 2025
Titles such as Mad Max: Fury Road, Godzilla vs. Kong, Happy!, Aftersun, A Walk Among the Tombstones, among others, will be departing from Netflix in February 2025.
 Ana de Armas gets ready to join Keanu Reeves’ John Wick in the latest Ballerina video.
In a new video for Ballerina, Ana de Armas' character, Eve Macarro, sets off on a quest driven by revenge that ultimately brings her to Keanu Reeves' John Wick.
Ana de Armas gets ready to join Keanu Reeves’ John Wick in the latest Ballerina video.
In a new video for Ballerina, Ana de Armas' character, Eve Macarro, sets off on a quest driven by revenge that ultimately brings her to Keanu Reeves' John Wick.
 Your upcoming phone might shift colors during the day.
An iPhone that can change colors? This could become a reality in the future thanks to this innovative technology.
Your upcoming phone might shift colors during the day.
An iPhone that can change colors? This could become a reality in the future thanks to this innovative technology.
 How to capture monsters in Monster Hunter Wilds
Though it may be named Monster Hunter Wilds, hunting doesn’t necessarily equate to killing. If you're looking to capture a monster but are unsure of the process, we’ll guide you through it.
How to capture monsters in Monster Hunter Wilds
Though it may be named Monster Hunter Wilds, hunting doesn’t necessarily equate to killing. If you're looking to capture a monster but are unsure of the process, we’ll guide you through it.
 The top dishes to enjoy in Monster Hunter Wilds
Satisfying your hunter's hunger with a warm meal can provide various buffs in Monster Hunter Wilds. Below are the top meals to consume before embarking on a major mission.
The top dishes to enjoy in Monster Hunter Wilds
Satisfying your hunter's hunger with a warm meal can provide various buffs in Monster Hunter Wilds. Below are the top meals to consume before embarking on a major mission.
Optimize your Sony TV's picture quality by adjusting these settings.
Sony TVs come equipped with some of the best processing technology, and by making a few adjustments to the settings, you can ensure optimal performance.